About Me

My photo
Learn Art and Design. Advertising, Graphic design, Fine Art, Fashion trends, Artist of the world, Artwork, Drawing techniques, sketching, Painting, Digital Art, Art and design tutorial.

Follow us


Wednesday, 24 February 2021

The Act of Writing, Cooking, Music, Dancing relates to the Act of creating an Art and there is a correlation between them, Elements of Art


For a Chef, food relates to the emotion, herbs, smell, colour of the food. Every ingredient is essential for cooking and should be in an exact amount. You should know how much ( amount of) spices you have to put in the recipe to make it a delightful recipe. For example, salt should be in a proper amount in the food, not too much nor too low. Too much salt in the food makes it sour. Furthermore, too less salt in the food makes it sweet. You have to put everything exactly the way it should be. 


    Photo by Nadine Primeau 


Likewise, for an Author, every piece of writing includes peculiar facts and details. These facts and details are essential elements. It should be dramatic but not too dramatical because it will become contrive. The character should be more natural in terms of nature. The story structure should be focused on and related to the main character. The emotion and characteristics of the characters should be flows with the story or writing. It should not be too exaggerated or out of the story. Otherwise, the narrative will not work for the audience or the reader.


    Photo by Patrick Tomasso 


Furthermore, for a Musician, it is important to put each element which is Sound (overtone, timbre, pitch, amplitude, duration), Melody, Harmony, Rhythm, Texture, Structure, Expression (dynamics, tempo, articulation) in the accurate phase.

Musicians can talk about the key of "A", and they all know it means "a pitch relating to 440 oscillations per second of Vibration.

Music also considers a healing tool for human souls. In our leisure time, we often listen to music. If one of these elements missed or not correctly stabilised, you may not enjoy the music. Also, it will not please your ears or soul. 


Photo by Gabriel Gurrola 


For a Dancer, these four elements are essential in the dance Time, Body, Energy, Space. They know when and how to move their body with the correct timing and beats of the music. They also know how to utilise the space and which props to use to manipulate or to enhance the dance. Props may be manipulated to exaggerate gestures, to create rhythms, to convey ideas or feelings. When a dancer put the elements into their dance, it is considered as the best performance.

But the time they went out of rhythm or missed one of these elements, It will not please the audience. 


Photo by Rojan Maharjan 

Emotion is the common element in all the above categories. It also plays a crucial role in Art.


In the same way, for an Artist, every element of Art is essential in an artwork. The artist manipulated these elements with the principles of design and compose a piece of art. 

However, Artwork doesn't need to include all the elements. sometimes, only two elements present within the art.

Through knowing these elements, one can discuss, depict, analyze, critic, appreciate an Artwork/ Design/ Painting and by knowing it one can create art by themself.


Line, Colour, Tone/Value, Form/ Shape, Texture, Space are the main elements of an Art.


Let's discuss it furthermore,


1) Line:- Line displays a strong suggestion of movement. The vertical tine carries the eye upwards. It also conveys a feeling of alertness and life. The horizontal line produces a sense of repose and tranquillity. The diagonal line suggests motion, and the free-flowing curved line indicates gentleness and grace. Lines in a drawing can be delicate, bold or expressive. While the line isn't something found in nature. It is assuredly essential as a concept for depicting objects, symbols, and defining shapes.


2) COLOURMay cause emotional reactions. Red gives the impression of heat and excitement; blue gives the sensation of coldness and restfulness. Warm colours appear to come forward, while cool colours suggest distant objects. Most objects get their colour from the light when light shining on them. They absorb some wavelengths of light and reflect others. Different wavelengths absorbed to various degrees. What gets reflected is a mixture of what does not get grasped at each wavelength. Other objects (such as the sun) emit light as a spectrum of various wavelengths. 

All colours come from light; if there is no light, there is no colour. The name of the colour is called HUE (red, blue, yellow and their mixtures).


a) PRIMARY COLOURS - They can't be made by mixing other colours but can be combined to create a valuable range of colours. Red, Yellow, Blue. (RBY) 


Gif Animation by Susain Art


b) SECONDARY COLOURS - Mixing Primary Colours. Orange, Green, Violet

Red + Yellow = Orange 👇
Yellow + Blue = Green👇

Blue + Red = Voilet👇


c) INTERMEDIATE COLOURS - Combining three accurate primary colours in equal volumes would produce black, but this is hard to accomplish in practice. Therefore a "key" pigment, usually black, is added to printing to create dark shades more efficiently. This mixture referred to as CMYK, where K stands for Key (BLACK). 

Yellow-green, Blue-green, Blue-violet, Red-violet, Red-orange, Yellow-Orange.


d) TERTIARY COLOURS - A tertiary colour or intermediate colour is a colour made by combining the full saturation (purest (truest) version) of one primary colour with half saturation of another primary colour and none of a third primary colour. Citron, Russet, Olive.


e) NEUTRAL GREY - The three primary colours mixed.


f) SPECTRUM - The colours which together make up sunlight, the colours seen Through a glass prism, the seven colours of the rainbow, 

VIBGYOR:- Violet, Indigo, Blue, Green, Yellow, Orange, Red 

Violet has the shortest wavelength (highest frequency), and Red has the longest wavelength (lowest frequency)


e) COMPLEMENTARY COLORS - The mixture of two primary colours say Red and Yellow, i.e., Orange is complementary to other primary colours like Blue.


2) TONE: The basic meaning of tone in art is the amount of lightness or darkness, including the light and shade, on an object.


3) FORM: Form is the essential structure or the organization of all parts in a work of art.


4) TEXTURE: Texture in art pertains to the character of the surface. The texture can be tactile (as felt with the fingers) or visual.


5) SPACE: Space in art is the vacant area within or without an object, such as inner space in architecture, a penetrating area in the voids of sculpture, or the illusion of space or distance on the flat surface of a painting or drawing.


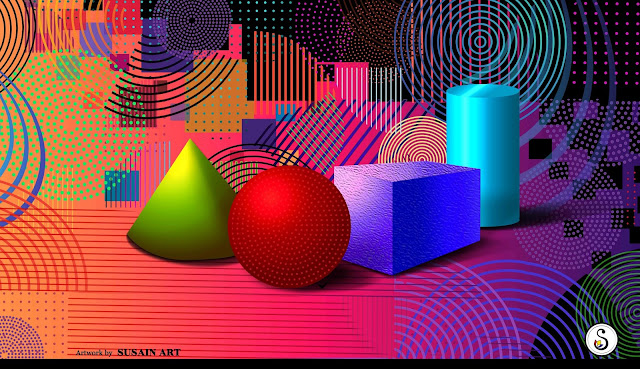
                              Shown Tone, Form, Texture, Space in the above picture


Elements of Art allow us to 

1) Specify what an artist has done.

2) Analyze what is going on in a particular piece of art.

3) Communicate our thoughts and findings using a familiar language.


Tuesday, 16 February 2021

DESIGN GUIDE for Beginner/Graphic Design Layout Rules and Techniques for a Good Design


👍  DOWNLOAD 

Sunday, 14 February 2021

What is Linocut Printmaking/Block Printing and How to develop your own print, diy? A Linocut Printmaking Process/ tutorial/step by step Introduction by Susain Art for beginners

Pic.01

 What is Linocut Printmaking?

Linocut (known) as a lino print/lino printing/ linoleum art) is a PRINTMAKING technique, a slightly different form of WOODCUT in which LINOLEUM sheet is used. Linoleum is generally diced/ curve, much easier to cut than wood.

The linoleum sheet has two types, one is a simple sheet itself (Pic.02) another one is mounted on a wooden block (Pic. 03) both easily available online or in an art store. The board and linoleum sheet available with different thicknesses of levels. Linoleum surface used for curving/cutting and to create a Relief design (Pic..01) with the help of a sharp knife.


     Pic.02. without wood board


 Pic.03.with wood board


The knife is available in two different variations.

1) classic knife (chisel, Pic.04) which comes with a fixed wooden handle.
2) Modern knife that comes with a wooden or plastic (Pic.05,06) handle with interchangeable gouges. In this type of knife, there is a blades slot into the hole at the base of the handle, and the wooden stick is used to push the blade out for changing or storage and which is very convenient and it comes with different gougesSmall 'V' gouge, Large 'V' gouge, Small 'U' gouge, Large 'U' gouge, knife. 

With the help of these gouges, we carve those areas on the linoleum sheet where we want to show no ink or where we want to leave the area white on the paper. On the other hand, we left those areas uncarved (raised) where we want the ink on the paper (printed area). After that, the linoleum sheet is inked with a roller (called a brayer) and then impressed onto a paper or fabric. The actual printing can be done by hand or with a printing press.
Pic.04 Classic Knife


Pic.05 Cutter with wooden hand


Pic.06 Cutter with Plastic storage handle


What is Block Print?

Block printing is the process of printing in which we engraved a design or a pattern on the wooden block or a linoleum sheet to print a pattern or design on the fabric or paper.


A Linocut Printmaking Process/ tutorial/ step by step Introduction (How to develop your print, DIY? 

STEP 1: Material/Tools you will need for the First Step

One sheet of linoleum, size 8' x 10' inch
Lino cutting tool with an assortment of blades
Pen, Pencil, Ruler, Tracing sheet.


Pic.07 Tools / Material 


STEP 2: Drawing a Pattern or Illustration on Tracing Sheet


Start drawing your Pattern Design or Illustration (this could be anything you want, this is up to you,on the tracing sheet (take the similar size 8'x 10') as shown in Pic.08. Mark margin of 1' inch outside border, which will give it a nice clean look after printing. Tip: Draw lines to help you to compose the layout and scale.


                                                           Pic.08 Drawing on Tracing Sheet


STEP 3: Tracing the Drawing on the Linoleum Sheet

After tracing the drawing on the tracing sheet, it is the time to trace the pattern from the tracing sheet to the linoleum sheet. You can completely skip step 2, if you are good at freehand drawing, by creating the Pattern/drawing directly onto the linoleum sheet (pic.9.2). Remember the drawing should be in a reflective image because it reflects a mirror image of the drawing when printed on a paper or a piece of fabric (typeface in the pic. 09.1 is a reflective image). 

In this step, think about the negative and positive space, which means the area you want to show to be white or not inked (positive space) and the areas you want to be inked (negative space) when printed on the paper or fabric. Tip: Use a black marker or a sketch pen to mark the inked area or uncurved area (black marked area as shown in Pic.09.1), which will make it easier to curve the area on the linoleum.


                                                        Pic.09.1 Tracing on linoleum sheet


Pic.09.2 Drawing directly on linoleum sheet


STEP4: Curving or Cutting on the Linoleum Sheet

Now it is time to start the Curving Process but before you start it please be careful while using tools they are very sharp and easy slips on the linoleum sheet. Don't put your hands or fingers in front of the tool while using it instead of trying to hold the linoleum sheet with the other hand. 
Starts curving or cutting the negative space or the area you wanted to show white or without ink on the paper or fabric.
Use small V gouge for the small outline, fine details, tight curves, sharp edges, narrow cuts curving (Pic.10)
Use Large V gouge for deep and larger width lines curving
Use U gouge to curve the small area and fine details 
Use U gouge to curve the larger area and curves
Use a knife flat gouge to cut the huge area

Pic.10.Used small V gouge for the outline

Pic.11.Full Curved LINOLEUM SHEET


Watch from Step 1 to Step 4 tutorial video 👇


STEP 5: The Printing Process 

               Material/Tools you will need for the Second Step

Handmade sheet or Cartridge Paper, Baren, Brayer/ Roller, Glass/ Acrylic Sheet, Ink, Double side tape, Curved Linoleum sheet


Pic.12 Tools for the printing process


After Curving Process, prepare the ink for the printing process. 
Take out two large drops of ink on the glass sheet/ Acrylic sheet. Begin rolling the ink on it with the help of brayer or roller. Roll it until the ink is smooth and textured. (pic. 13)


Pic.13 Rolling Ink on an Acrylic Sheet

Next step, Set the linoleum sheet fixed in one place.
Use a double-sided tape to fix the linoleum sheet. Put a piece of the double-sided tape (3 inches) on the back of the sheet and around the four sides (Pic.14) So that the linoleum sheet will stay fixed and not slip on while applying the ink or when we are printing a print.

                                                     Pic. 14 Placing double-sided tape 


Applying the ink to the linoleum sheet 

After that, start applying the ink to the linoleum sheet with the Brayer/roller. (Pic.15).
keep applying it until the desired area fully covered with the ink or the ink is evenly distributed. (Pic. 16)


 Pic.15 Linoleum sheet Inked well


Pic.16 


Placed 2-inch paper strip around the corner of the linoleum sheet 
for the registration mark. 

What is the registration mark and why we should place it?


Registration marks are placed on the printing plates to position the paper correctly for printing. They are essential for producing multiple printing at the same spot/ place/ area. The accuracy remarkably depends on these marks.


Pic.16 2 inches Paper strips for registration mark


Now place a handmade sheet/ Cartridge sheet onto the lino sheet, where you want the print to be print.
Use a Baren or a flat surface object to transferring the ink from the lino sheet on the paper, press and move Baren in a circular motion. The pressure should be through the whole of your hand. Keep moving Baren in a circular motion until whole ink transfer onto the paper from the linoleum sheet. (Pic. 17)

write down the print number, Date, Title of the Print in the middle, and your signature bottom of the print
Pic.17 Final PRINT


Watch Step 5 tutorial video 👇


Follow us for more updates


Recent Post

The Act of Writing, Cooking, Music, Dancing relates to the Act of creating an Art and there is a correlation between them, Elements of Art

  For a Chef , food relates to the emotion , herbs , smell, colour of the food . Every ingredient is essential for cooking and should be in...

Popular Posts